
pkrp-about
This session introduces ākonga to the micro:bit hardware and MakeCode development platfrom by guiding them to create a multimedia animation in celebration of Matariki.
Use code to combine lights and sounds to program an animation that includes a shining star, banner letters, and a familiar melody. The MakeCode simulator provides a full and effective alternative to physical hardware, which make it an excellent option in settings where hardware availability or other considerations are a constraint.
pkrp-base-req
{External}
[link-url] https://makecode.microbit.org/
[heading] Coding Platform
[sidebar-label] Coding Platform
[sidebar-pill] MakeCode
[sidebar-pill-sublabel] Program micro:bit with
[title] Microsoft MakeCode
[title-alt] MakeCode
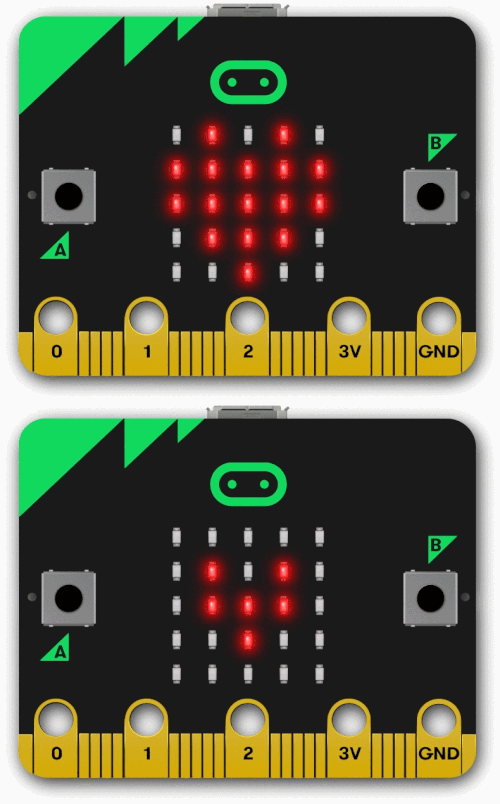
[card-description] A free, web-based coding platform to program the pocket-sized BBC micro:bit computer using color-coded blocks or text-based code, featuring a simulator to test programs before you even connect a device.
pkrp-links
pkrp-dt-detail
ctdt-po2
Assembling sequences of code blocks to produce specific outputs
Understanding a programmable digital system
Identifying and correcting errors; simple debugging
Understanding that changing values changes outputs and outcomes
Considering how the program components work together
dddo-po1
Using digital tools to create a purposeful multimedia outcome
Making design decisions and intentional creative choices
Recognising that the finished program produces a real, shareable outcome
pkrp-cc-detail
arts
A musical thinking exercise to reproduce a tune; a constrained but creative visual design challenge to produce a shining star and scrolling text display
social-sciences
Exploring the cultural significance of Matariki and engaging with the Māori New Year
pkrp-diff
Use the MakeCode micro:bit simulator, either as a practise tool in a digital context ahead of setting up micro:bit devices, or if micro:bit devices aren’t accessible in your learning environment.
Get creative with how stars are represented in the animations, letting learners interpret the shape of their star in fun and unique ways given the limitations of the micro:bit LEDs.
pkrp-ext
Expand the musical challenge to experiment with programming other familiar melodies, or challenge learners to compose their own original melody.
Prompt learners to apply the principles from this activity to program other shapes, letters, and sounds that celebrate Matariki, te tau hou Māori.
pkrp-notes
Teachers should consider:
Device Preparation as a pre-lesson task, including charging batteries, loading applications, and connecting to the internet.
Group Assignments and logistics, including supporting student collaboration and content focus.
pkrp-dsw
Take steps to make sure device use is safe, supervised, and purposeful throughout. This activity uses MakeCode, a browser-based block coding platform developed by Microsoft, and the micro:bit device.
MakeCode does not require an account to build programs. A Microsoft account is only required to save or share projects online. Consider whether this is appropriate for your context and how to manage the security of student infromation.
General Guidance
Set clear expectations around safe and purposeful device use at the start of each lesson.
Remind ākonga of your school's digital use agreement before beginning any lesson that involves the internet or a third-party digital platform.
Before the activity
Familiarise yourself with the MakeCode platform before the lesson at makecode.microbit.org, and make sure MakeCode is accessible on your school devices.
If you’re using physical micro:bit hardware, then test USB connections before the lesson as some managed school devices restrict USB peripherals.
micro:bits are small, robust devices but should still be handled with care, particularly when connecting and disconnecting USB cables.
Supervise device and hardware use throughout the activity, particularly for younger learners navigating the tools for the first time.
During the activity
Supervise internet use throughout, circulating actively to monitor and support ākonga.
Discuss openly what is and isn't appropriate to include in a Scratch project.
Encourage ākonga to treat all sources about Matariki, particularly those representing mātauranga Māori, with respect and care as it’s part of a living, culturally significant body of knowledge.
pkrp-lp
This activity can be completed in two ways, either using the physical micro:bit device or the MakeCode online simulator. Both produce a fully functional Matariki animation program. The key differences are in setup requirements, classroom logistics, and the experience of seeing the program run on real hardware. Here are some features of each option to help you choose the approach that suits your context:
>>> Hardware Pathway | micro:bit + MakeCode
This requires one micro:bit and one USB cable per learner or group, and a laptop or Chromebook with a USB port per micro:bit device.
Introduce the micro:bit as a small, programmable computer; show ākonga the LED matrix, buttons, and USB connector.
Open MakeCode, and model the interface, like the on start block, the block palette, and the simulator panel.
Model adding a show LEDs block and designing a star pattern on the 5×5 LED grid, then flash to the device and show the result on the physical hardware.
Support ākonga to design their own star animation and flash their program to the device.
Begin adding a scroll string block for the Matariki banner, and test it on the device
Add a play melody block, and select a familiar tune to test on the device. Hearing the melody play through the micro:bit speaker is a worthwhile experience.
Complete and debug the full program sequence.
Extension — experiment with other shapes, letters, sounds, or compose an original melody using individual note blocks.
Share finished micro:bits — pass them around the class, display them, or connect to a speaker for effect.
Reflect — what does it feel like to hold a device that runs a program you wrote?
>>> Software Pathway | MakeCode Simulator
This requires a laptop, Chromebook, or other device with a browser and internet access. It’s well-suited where micro:bit hardware is unavailable, where USB access is restricted on school devices, or where kaiako prefer a lower-logistics first encounter with micro:bit and MakeCode.
Navigate to the MakCode platform on a school device and make sure it loads correctly. No account is needed to build and test a program in the simulator.
Open a new project and confirm the simulator panel is visible, where ākonga will see their program running in real time as they build.
Introduce MakeCode, what it is, how the block palette works, and how the simulator shows the program running live as blocks are added.
Model adding a show LEDs block, designing a star on the 5×5 grid, and watching it appear on the simulator with immediate visual feedback.
Support ākonga to build their own star animation and experiment with the LED grid design.
Add a scroll string block for the Matariki banner, and watch it scroll across the simulated display.
Add a play melody block, and listen to the melody through the computer speakers via the simulator's audio output.
Test and debug the full sequence in the simulator, and adjust until the animation, text, and melody play in the right order.
Extension — try other shapes, letters, a different melody, or compose an original melody using individual note and duration blocks.
Share finished programs — connect to a projector or screen, where each learner or pair can run their simulator and show the class their Matariki animation.
Reflect — what was it like working with a virtual micro:bit? What might be some advantages of testing in a simulator before flashing to hardware?